Choosing the right snowboard is a big decision, as are choosing the right boots and bindings, but we’re here to help!
Snowboard Size
Length
The shorter the board is, the more manoeuvrable it will be and therefore easier to learn on. The longer the board, the more suitable it’ll be for riding a variety of terrain all over the mountain. Snowboard length is measured in centimetres and is sometimes abbreviated to just the last two digits. Kids’ snowboards run as short as 100cm and race/powder snowboards can be upwards of 180cm. For most riders, a board should come up to just below the chin. Intermediate to advanced snowboarders may opt for a board that comes up to between the chin and nose, the extra length being more stable and all-mountain capable.
Width
While length has some room for personal preference, snowboard width is directly tied to your foot size. Snowboarders with small feet need narrow snowboards and conversely, snowboarders with big feet need wide snowboards. Snowboard width is measured in either cm or mm and can be found in the snowboard’s specifications under waist width. The best way to find the correct snowboard width is to stand on a board that is flat on the ground. When standing, the toes and heels of your boots should be flush or slightly over the edges of the snowboard. If you have too much ‘overhang’ you’ll experience ‘toe drag’, if the board is too wide you’ll struggle to apply pressure through the edges.
Flex
This is simply how the board bends. Stiff flex allows a board to grip ice and hard snow at speed; soft torsional flex makes a snowboard more “forgiving,” but less responsive. Manufacturers do differ slightly but will all give the board a rating from 1 (soft) to 10 (stiff). This is where rider weight and stature come into the equation. Snowboarders who are heavy for their height can stay within the length and width guidelines, but should look for boards that have a stiffer flex, whilst lighter riders will need snowboards with a softer flex.
Snowboard Anatomy
Base – This is the bottom of the snowboard, that’s in contact with the snow. Snowboard bases are made in one of two ways: sintered or extruded. A sintered base is superior – it’s more durable, faster and holds wax better than an extruded base. It’s also more expensive and difficult to repair. If you’re looking for high performance, go with a sintered base; for a snowboard on a budget, an extruded model will do.
Profile/Bend – This is the gentle arch the board makes when you rest it on a flat surface. It’s closely related to flex: the higher the camber, the more pressure the snowboard puts at the nose and tail and the more control and response you’ll get. A flat camber, is exactly that – flat. It’s a board profile that is more suited to either freestyle of powder, as its less catchy. Many boards now use a variety of rockered shapes, which aim to make a board perform both on and off the groomed pistes by raising the tips for more float.
Edge – The length of metal running along the side of the board; it is what lets the board bite the snow when turning.
Flex Point – The flex point is located between the two bindings and is the point where the snowboard begins or ends its flex and allows for sidecut radius contact.
Nose – The front end, or ‘tip’ of the snowboard. The nose length is the length of snowboard from the widest part of the board’s nose to the tip of the nose, while the nose width is the widest part of the snowboard measured across the front tip or nose area of the board.
Tail – The rear end, or ‘tail’ of the board, though in a twin freestyle board this’ll be exactly the same as the nose. Tail length is the length of the snowboard from the widest part of the board’s tail to the tip of the tail.
Waist width – The narrowest point of the snowboard, in the middle between the bindings. Waist width of a snowboard should be relative to the size of your feet.
Sidecut radius – This is the measurement of how deep or shallow the curve of the snowboard’s edge is, from nose to waist to tail. The smaller the sidecut radius the tighter you’ll be able to turn. A snowboard with a larger sidecut will make big arching turns.
Top sheet – The top of the snowboard is where the bindings are mounted, and is often used for striking and detailed graphics.
Snowboard Construction
Usually made of wood or foam, a snowboard’s core should be light, resilient and durable. Some snowboard designers say that a good wood core retains its liveliness and camber longer, but this feature alone shouldn’t lead you to choose one snowboard over another.
There are two main types of construction; cap and sandwich. The topsheet on a cap snowboard extends to the edges. On a sandwich snowboard the topsheet is flat, with the armor plating on the sides provided by separate sidewalls.
While both types of construction have their merits, it’s the guts of the snowboard, the materials under the skin, that make the biggest difference. A snowboard consists of the following (from the base up): plastic base, (P-tex), metal edges, fibreglass or epoxy, wood or foam core, more glass or epoxy, steel inserts to attach the bindings and topsheet.
Fiberglass is a major structural component of a snowboard. Different weaves and placement of fibreglass within a snowboard can influence its flex pattern, strength and weight. All snowboards contain “unidirectional” glass fabric (with most of the fibres running the length of the snowboard). Torsionally stiff snowboards use additional layers with the fibres running diagonally. Any layer may be reinforced with carbon fiber or Kevlar, which can help reduce the snowboard’s weight while improving its strength.
Types of Snowboard
There are now four main types of riding styles which would determine what type of snowboard is right for you:
- Freeride
- Freestyle
- Alpine
- Splitboard
Don’t forget Ski Club members are entitled to some fantastic discounts with top UK retailers and ski specialists such as Ellis Brigham and Snow+Rock. If you’re looking to buy a new snowboard this season check out Ski Club discounts.
Freeride
While it may be an overused term, ‘freeride’ is still the best way to describe the majority of snowboarders and soon-to-be snowboarders, who intend to utilise the whole mountain. From the feel of carving a turn on a freshly groomed slope, to honing tricks in the park, to the unique feeling of floating in fresh powder. Freeride snowboards are the most popular type of boards, accounting for half of all sales. Traditionally cambered and twin tipped with medium flex. For most part, there isn’t a ‘bad’ snowboard on the market. Even the least expensive snowboard produced today can out-perform the “signature” series snowboards of a decade ago This is the best type of snowboard to learn on and can be used anywhere on the mountain. Many now utilise a ‘rocker’ shape – pronounced rise in the tip and tail – to make riding in powder easier and increase float.
Freestyle
Jumps, spins, grabs, rails and boxes in sculpted snow parks and in the halfpipe. Influenced by skateboarding, freestyle has an enduring popularity that has been further boosted by its inclusion in the Winter Olympics. While the equipment for this type of snowboarding excels in park and pipe, it can also be versatile enough to be used across the whole mountain.
Freestyle snowboards are shorter, lighter and softer in flex (around 3-4), compared to freeride boards, which makes them manoeuvrable but controllable. Like freeride boards, freestyle models also make use of rocker and reverse camber, which allow a wider range of tricks and riding styles however you can get a freestyle board in practically every profile. So make sure you test a few different profiles out to see what works best for you.
Carving/Alpine
This type of riding style is not seen in every resort, but continues to popular in some parts of Europe, and there are races at World Cup level and in the Winter Olympics. A ‘freecarve’ snowboarder enjoys the full length and width a mountain has to offer, continually transitioning from one turn to the next. Alpine riding is all about high speed and hard turning on groomed snow. The stiffer flex and narrower width make these boards unforgiving for beginner snowboarders. Carving snowboards permit quick edge changes and have excellent high-speed superior edge-holding power on hard snow and good stability for speed.
Splitboard
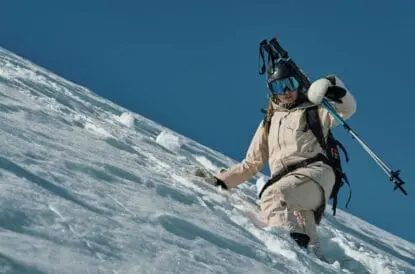
Determined not to be left behind in the backcountry, splitboarding is a growing trend designed to keep up with your ski touring friends.
Specially designed boards and bindings lock together for a smooth downhill ride, but are split in two pieces and skins placed on the underside to enable them to go uphill and seek out the best powder.
A couple of bits of extra kit are needed to make splitboarding a reality, such as skins, specialist bindings and, in most cases, a pair of ski poles to assist in the uphill part of the climb.
Snowboard Care
A brand new snowboard is usually ready for use with a good layer of wax. This is enough for a week or so of use, depending on conditions, after which you should consider either a basic or full service. At the end of the season if you’re only going to do one thing, make sure you wipe your board down with an old towel to make sure it is dry before you put it away. Otherwise a layer of rust can build up on the edges. If the edges are corroded when you take them out for your next trip, the base probably needs a grind and a good waxing. A full snowboard service starts at £25-40 and is available in most snowsports shops.
You could put your snowboard in for a full service before you put it away for the summer, then next winter you’ll be all ready to go. If you fancy a bit of DIY, you can keep the base from drying out by giving it a storage wax yourself: Apply a thick layer of hot wax, iron it in, let it dry and don’t scrape it. It’ll prevent the base from drying out and won’t allow rust to form on the edges. Next winter you’ll need to give the base a good scraping before hitting the slopes.
Snowboard Boots
To check the fit of your snowboard boots, you must try them on with your snowboard socks. For the best fit, shop when your feet are at their largest – in the afternoon, evening, or after some physical activity. Your feet can swell up to half a size while snowboarding, so it’s crucial that you aim to fit them at their largest. Also, it’s best to visit a snowboard shop where experts can analyse your feet and help you narrow down the choices. Bear in mind that once the boots have been ridden, the internal padding will become compacted, consequently increasing the amount of space slightly. The most important indicator of a proper boot fit is the heel holding power of the snowboard boot.
Remember, snowboarding boots should fit snugly around the ankle, and should hold your heel firmly down in the boot. You could actually do some minor adjustments to prevent your heels from lifting inside your snowboard boots. Add devices like a butterfly, a tongue pad, or an ankle strap to do so.
Boot Flex
Aside from boot fit and heel holding power, checking the flex of your snowboarding boots is important. The degree of boot flex varies depending on your riding style. Freestyle snowboard boots are usually lower cut, with loose, molded inner liners for more flexibility. Freeride snowboard boots tend to have a stiffer upper boot for added support, and a lace-up inner that allows you to adjust the amount of flexibility. Hard snowboard boots support your foot, ankle, and lower leg firmly, making them best for racing and high-speed carving on hard snow surfaces.
Soft Boots and Strap in Bindings
A good fit between your snowboard boots and bindings is essential – if possible have these with you when purchasing new boots,or look at buying a complete set-up with compatible kit.
Hard Boots with Plate Bindings
Hard snowboard boots in combination with plate/lever snowboard bindings give the most solid and direct control over your snowboard. All your body movements are directly transmitted to the snowboard without padding to absorb much of this energy. Freecarvers prefer this type of snowboard boot-binding combination as they need this kind of control in high speed turns.
Having the right pair of snowboard boots is essential. It could make the difference between spending hours in excruciating pain, or being in blissful comfort on the slopes. You don’t need the highest performance snowboard boots to be comfortable. All you need is a pair of boots that fit well, is designed for your preferred snowboarding style, and is in sync with your snowboard binding system.
Snowboard Boot Care
Snowboard boots need to be dried out thoroughly at the end of each trip before they are put away for storage. In some snowboard boots you can take the liners out of the shells. This definitely helps against any unpleasant odours! Bundling up a small amount of news paper in in each boot helps to dry out boots faster. The same can be achieved with teabags, just be sure not to use the teabags afterwords. That would ruin your day. Alternatively you can dry them out on boot dryers if your accommodation has these, or you can buy plug in ones to take on your trip.
When putting your snowboard boots (and bindings) away it is best to do up the buckles, straps, and laces, roughly in a position used when boarding. This helps keep the general shape making them easier to put on next time around. It’s also best to store your snowboard boots, once fully dry, in a decent boot bag to stop any dust or other debris getting into the boots when in storage.
If you wear hard snowboard boots, you should also check the soles on a yearly basis for excessive signs of wear. Walking with them on tarmac, grit or other hard surface can quickly wear down the heel and toe pieces which can significantly affect the boots functionality and safety in hard snowboard bindings. Heel and toe pieces on some boots are replaceable.
Summary
When picking out your next snowboard and boots, think about the following points:
- Longer stiffer boards are designed for experts at high speed; for jumps and bumps consider a softer board.
- Boarders have a far easier time with snowboard boots than skiers – the soft shell and standard shoe size measurements makes fitting and wearing a charm!
- Splitboarding is a growing phenomena in snowboarding – beware the extra kit that might be needed to enjoy this discipline
- Remember your binding angles when setting up your new board

